

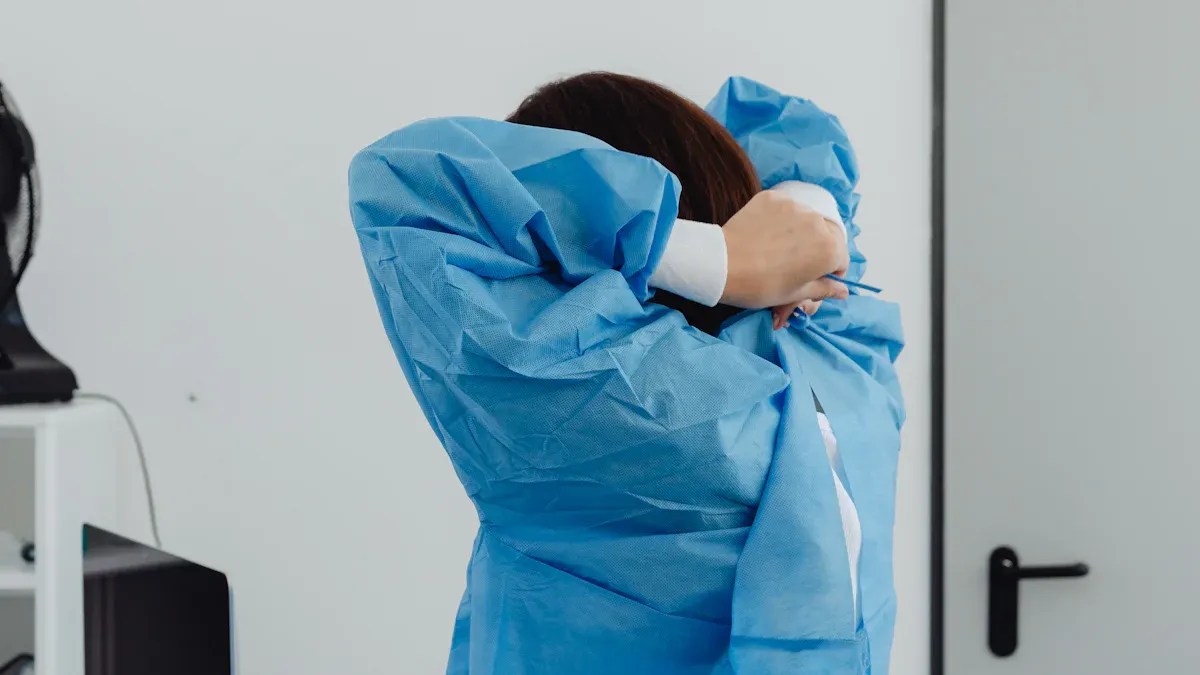
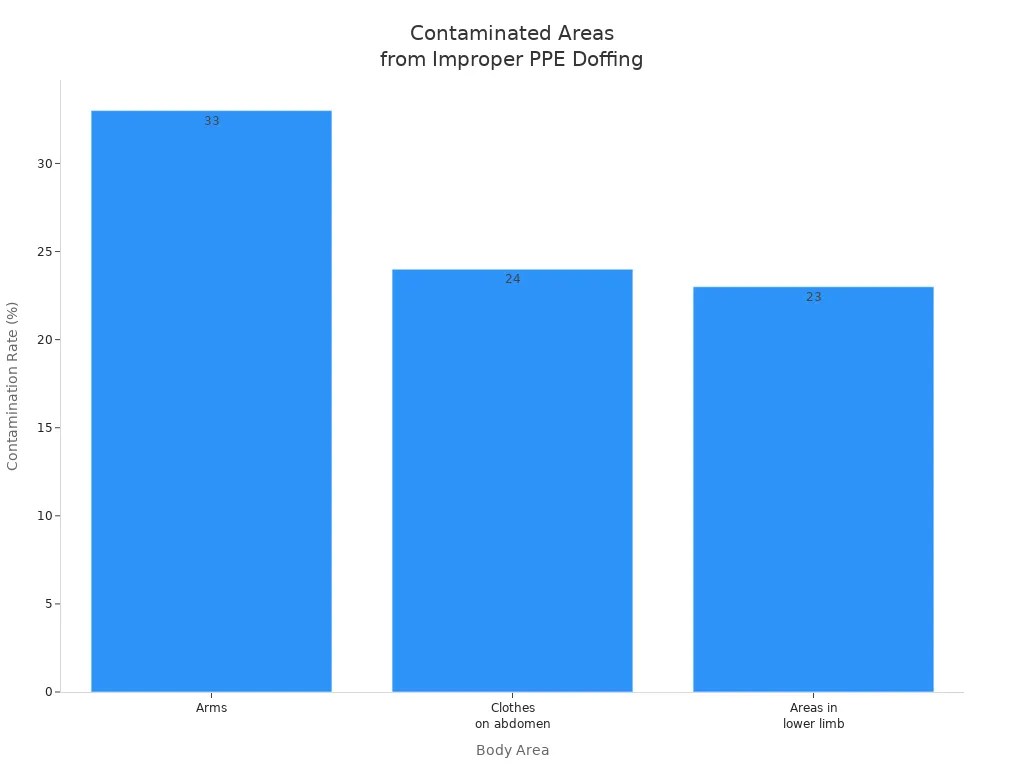
Doffing Level 4 PPE properly is essential to prevent cross-contamination in the ER. Knowing how to doff Level 4 PPE correctly can significantly reduce the risk of exposure to harmful pathogens. Studies indicate that 28.28% of doffings result in self-contamination, particularly in vulnerable areas like the arms and abdomen.
Risks of improper doffing include:
Exposure to serious communicable diseases.
Inconsistent hand hygiene practices across healthcare settings.
To minimize these risks, it is vital to follow the correct procedures on how to doff Level 4 PPE properly.
Key Takeaways
Always prepare a clean environment before doffing PPE to reduce contamination risks.
Follow the correct order when removing PPE: gloves first, then gown, face shield, and mask last.
Perform hand hygiene immediately after doffing to prevent the spread of pathogens.
Dispose of PPE properly in designated biohazard bags to protect the environment and public health.
Stay informed and trained on PPE guidelines to ensure safety in healthcare settings.
Preparation for Doffing
Gather Supplies
Before you begin doffing your Level 4 PPE, gather all necessary supplies. This preparation helps ensure a smooth and safe process. Here are some essential items you should have on hand:
Disinfectant wipes: Use these to clean surfaces after doffing.
Trash bags: Have a designated bag for disposing of contaminated PPE.
Hand sanitizer: Keep this nearby for effective hand hygiene.
Clean towels: Use these for drying your hands after washing.
Having these supplies ready allows you to focus on the doffing process without interruptions.
Clean Environment
A clean environment is crucial when doffing Level 4 PPE. Contaminated surfaces can lead to cross-contamination. Studies show that environmental contaminants often reside on rubbish bin covers, chairs, faucets, and sinks. These areas can harbor harmful pathogens.
To minimize risks, follow these steps:
Inspect the area: Ensure that the doffing space is free from clutter and contaminants.
Disinfect surfaces: Wipe down any surfaces you will touch during the doffing process.
Evaluate PPE design: Consider how the PPE fits and functions. Proper design can reduce contamination risks.
By preparing a clean environment, you significantly lower the chances of self-contamination. Remember, proper use of PPE is vital for preventing the spread of infectious diseases in healthcare settings. Always prioritize cleanliness before you start the doffing process.
How to Doff Level 4 PPE Properly to Prevent Cross-Contamination
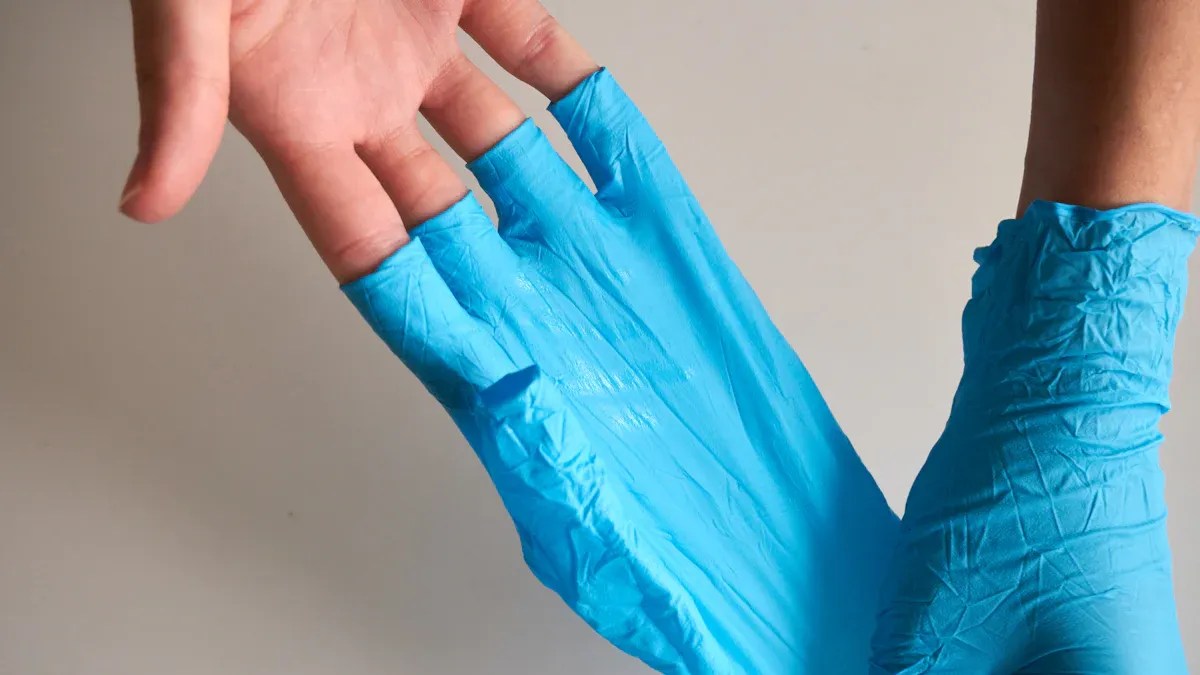
Remove Gloves First
Start by removing your gloves. This step is crucial as gloves often carry contaminants. Follow these steps to minimize contamination risk:
Grasp the outside of the glove near your wrist.
Peel the glove away from your hand, turning it inside out.
Hold the removed glove in your gloved hand. Carefully slide an ungloved finger into the wrist of your gloved hand. Avoid touching the outside of the glove.
Peel the glove off from the inside, creating a ‘bag’ containing both gloves.
Discard the gloves immediately and appropriately.
By following this method, you reduce the chance of self-contamination during the doffing process.
Take Off Gown
Next, you need to remove your gown. Improper gown removal can lead to significant contamination risks, with studies showing a 46% incidence of skin or clothing contamination. To safely remove your gown, do the following:
Perform hand hygiene: Sanitize your gloves before removal.
Move to a clean area: Ensure you are in a designated doffing zone free of contaminants.
Untie or break fasteners: Unfasten waist ties first, then neck ties for tie-back gowns, or tear adhesive strips for disposable gowns.
Peel the gown away: Pull the gown downward and away from your body, rolling it inside-out to contain contaminants.
Dispose or discard: Place disposable gowns in a biohazard bin or put reusable gowns in a designated laundry container.
Perform hand hygiene again: Wash your hands immediately after removal.
Following these steps helps ensure that you do not inadvertently spread contaminants.
Exit Patient Room
After removing your gown and gloves, exit the patient room. This step is critical to prevent cross-contamination. Here’s how to do it safely:
Remove all PPE except for your face mask before leaving the patient room.
Do not touch the outside of your gloves, as they are contaminated.
Wash your gloves with soap and water or use an alcohol-based hand sanitizer.
Grasp only the outer gown in front and pull it away from your body, breaking the attached ties.
While removing the gown, fold or roll it into a bundle in front of you.
Remove the outer gloves with the gown sleeves after finishing the gown removal.
Wash your inner gloves with soap and water or alcohol-based hand sanitizer.
By following these protocols, you minimize the risk of contaminating your clothing and skin.
Remove Face Shield or Goggles
Once you are outside the patient room, it’s time to remove your face shield or goggles. This step is essential to protect yourself from any remaining contaminants. Use the following method:
Remove goggles or face shield from the back by lifting the headband or ear pieces.
If your hands get contaminated during removal, immediately wash your hands or use an alcohol-based hand sanitizer.
Avoid touching the front of the goggles or face shield, as they may be contaminated. Premature removal increases the risk of exposure, so ensure you follow this step carefully.
Remove Respirator or Mask
Finally, remove your respirator or mask. This should be the last item you take off to minimize exposure to potentially infectious materials. Follow these steps:
Avoid touching the outside of your PPE with bare hands during removal.
Grasp the bottom ties, then the top ties, and pull the mask over your head and away to remove it.
Ensure that you do not touch the front of the mask, as it may be contaminated.
By adhering to these guidelines, you can effectively doff Level 4 PPE and significantly reduce the risk of cross-contamination.
After Doffing Procedures
Hand Hygiene
After doffing your Level 4 PPE, you must prioritize hand hygiene. Proper handwashing significantly reduces the risk of infection. Follow these steps to ensure effective hand hygiene:
Lather all parts of your hands, including the backs, wrists, palms, between fingers, and under nails.
Scrub for at least 20 seconds.
Clean your hands at key times, such as:
Before and after cleaning and disinfecting.
After touching frequently used items or surfaces, like door handles and shopping carts.
Before touching your eyes, nose, or mouth.
Before, during, and after preparing food.
Before eating.
After leaving public spaces.
Studies show that effective hand hygiene can reduce healthcare-associated infections (HAIs) by 35% to 70% when practiced consistently in healthcare settings. This statistic highlights the importance of maintaining proper hand hygiene after doffing Level 4 PPE.
Disinfect and Dispose
Proper disposal of PPE is crucial to prevent contamination and protect the environment. The materials used in PPE, such as polyethylene and plastics, do not biodegrade easily. They can accumulate in landfills, leading to significant environmental impacts, including microplastic pollution.
Proper disposal and management of these materials are crucial to minimize their negative effects on the environment.
When disposing of PPE, follow these guidelines:
Place disposable PPE in designated biohazard bags.
Ensure that reusable PPE goes into appropriate laundry containers.
Avoid leaving PPE in public areas to prevent contamination.
A study found that improper glove disposal can lead to contamination of the surrounding environment. In fact, 53% of healthcare workers’ hands were contaminated with pathogenic bacteria from occupied patient rooms. This emphasizes the need for proper training and awareness regarding glove doffing and disposal.
By following these after doffing procedures, you can significantly reduce the risk of cross-contamination and contribute to a safer healthcare environment.
In summary, doffing Level 4 PPE correctly is vital for your safety and the safety of others. You learned the importance of preparation, the step-by-step doffing process, and the significance of hand hygiene and proper disposal. Following these procedures helps prevent cross-contamination and reduces the risk of infection.
Training staff on these practices is crucial. Proper education ensures that everyone understands how to safely put on and take off PPE in hazardous environments. Stay informed about PPE guidelines to protect yourself and your colleagues effectively.
Remember, your actions can make a difference in maintaining a safe healthcare environment!
FAQ
What is Level 4 PPE?
Level 4 PPE provides the highest level of protection against infectious agents. It includes items like gowns, gloves, respirators, and face shields. You should wear it in environments with high exposure risks.
How often should I perform hand hygiene?
You should perform hand hygiene before and after doffing PPE. Additionally, wash your hands after touching any surfaces or items in the healthcare setting. Consistent hand hygiene reduces infection risks.
Can I reuse Level 4 PPE?
Generally, Level 4 PPE is designed for single use. Reusing it can increase contamination risks. Always follow your facility’s guidelines regarding PPE reuse and disposal.
What should I do if I accidentally touch contaminated surfaces?
If you touch a contaminated surface, immediately perform hand hygiene. Wash your hands thoroughly with soap and water or use an alcohol-based hand sanitizer. This action helps prevent the spread of pathogens.
Why is proper doffing important?
Proper doffing prevents cross-contamination and protects you and others from exposure to harmful pathogens. Following the correct procedures ensures safety in healthcare environments.


